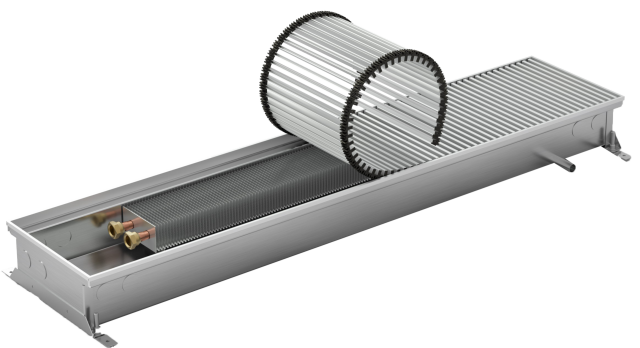
Standard contents -
AISI 316 stainless steel casing, non-lacquered -
Al/Cu RAL 9006 grey lacquered heat exchanger with bleed valve -
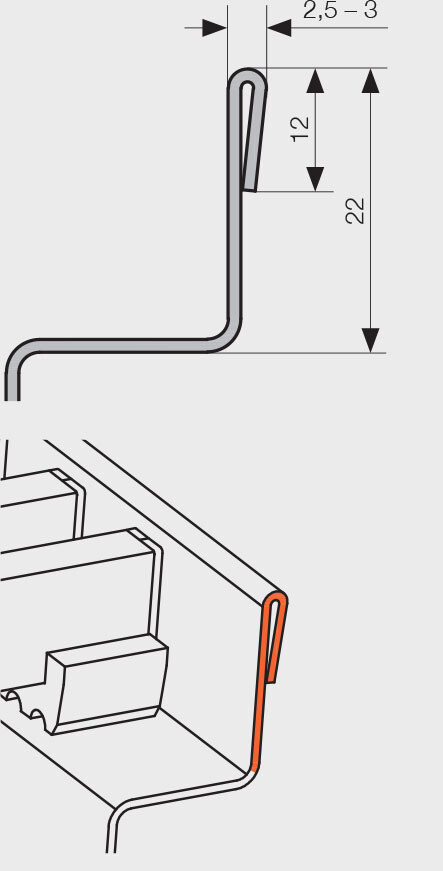
frame substituted by casing edges finished with hem -
AISI 316 stainless steel cover plate -
levelling set screws and 4 anchors -
hardboard cover to protect trench heater from contamination -
durable packaging, installation instructions | Optional accessories -
choice of grilles -
thermostatic head with incorporated control and immersion remote sensor -
24V DC power supply 60 W, 100 W -
room thermostat SIEMENS RAA21 or SIEMENS RDE 100.1 -
24V DC or 230V AC thermoelectric actuator -
lockshield, thermostatic valve, axial thermostatic valve -
½" × ½" 90° brass elbow for connection facilitation -
flexible connecting hose -
strengthened OSB cover for installation purposes |
Suitable grilles
| Roll-up aluminium silver | Linear aluminium silver
| Roll-up aluminium dark bronze | Linear aluminium dark bronze |
| Roll-up aluminium light bronze | Linear aluminium light bronze | Roll-up aluminium black elox - NEWS 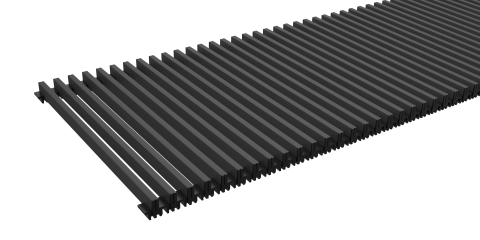 | Linear aluminium black elox - NEWS 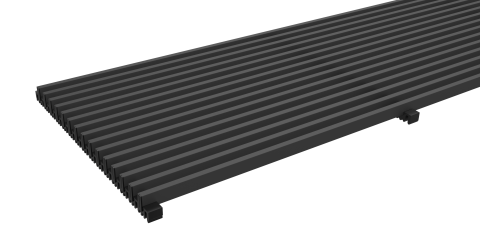 |
HEM FINISHING

KORAFLEX Pool FKP trench heaters are suitable for installation in humid environments. Fitted with built-in drainage and a sloping base. However, these trench heaters are not watertight and must not be flooded for long periods. For ideal operating conditions, we recommend using water with a pH of 7.2 – 7.6, with a maximum chlorine content of 1mg/l. Changes in these values – in particular lower pH values – will result in more aggressive water and corrosion of non-stainless steel components. Pool trench heaters installed in humid environments must be cleaned regularly with clean water and dried thoroughly. In case of visible calcareous deposits or oxidation, use a stainless steel cleaner followed by a suitable metal treatment product. For long-term satisfaction, it is essential that basic maintenance of the stainless steel components is carried out. Further information can be found in the installation manual and Operating and warranty conditions, available to download at websites.
FK TRENCH HEATER INSTALLATION
To ensure correct operation, it is essential that the following principles are respected
-
Trench heaters must be installed horizontally with the heat exchanger on the window side. For the grille to function correctly, the upper edge of the casing must be straight and level (not buckled or bent).
-
The maximum recommended distance of the trench heater from the wall/window is 100 mm.
-
The size of the trough in the floor for the trench heater installation should be at least 100 mm bigger (both in length and width) than the convector.
-
We recommend connecting the trench heater to the heating system using a lockshield and thermostatic valve. The heat exchanger connection is by an inner G½ thread. Following connection to the heating system, bleed and carry out a pressure test.
-
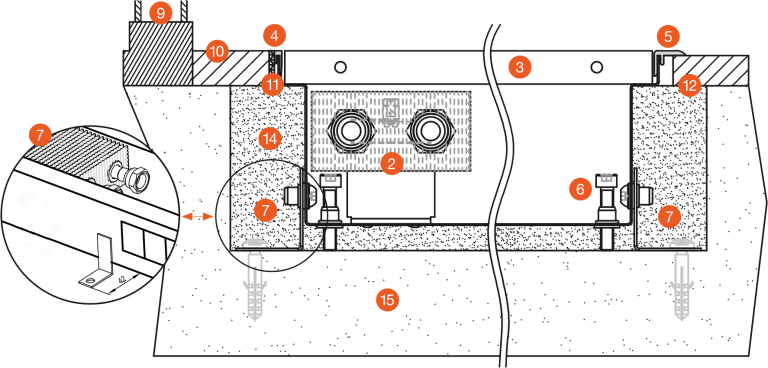
When concreting, the trench heater must be levelled using the set screws provided and fastened to the floor using the anchors provided. The anchors keep the trench heater in place while pouring concrete.
-
Using anchors will extend the bottom width of the trench heater by 42 mm from each side.
-
While pouring concrete, the trench heater may be weighed down.
-
While pouring concrete it is particularly important to brace the trench heater to prevent longitudinal buckling. Trench heaters are fitted with spacers for this purpose. (Please note: FKP models as standard are, however, not equipped with spacers.) Following concreting, these spacers are easily removed.
-
While pouring concrete or anhydrite it is essential to seal all connection openings to prevent leakage.
-
Where the trench heater is not concreted in, floor supports are recommended to be used to incorporate the trench heater into a raised floor. Standard trench heater models are not self-supporting.
-
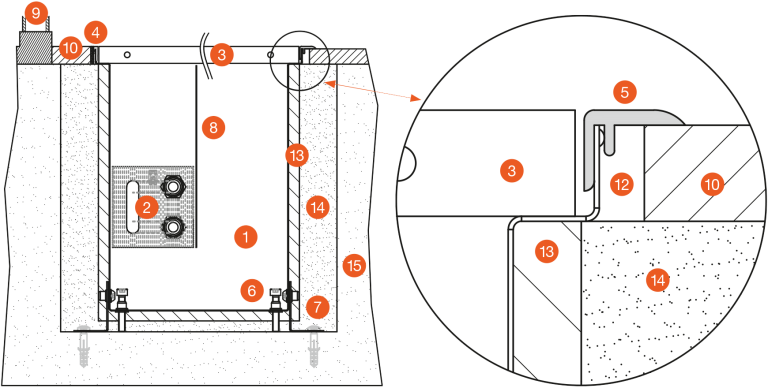
We recommend insulating the outer side of the trench heater casing along the length of the heat exchanger with polystyrene to prevent heat loss into the floor.
-
To avoid contaminating the trench heater, we recommend maintaining the protective hardboard cover in place during construction work. The board, which is included in the standard contents, is not suitable for walking on and serves solely to protect the trench heater from contamination during installation. Strengthened OSB covers for installation purposes are available as option extras.
-
Trench heaters fitted with stainless steel casings installed in humid environments – marked KORALEX Pool FKP – are equipped as standard with overflow drains. During installation, the pipe at the bottom of the trench heater must be connected to piping with sufficient gradient to drain overflow water. We recommend installing a U-bend to prevent odour.
TRENCH HEATER MULTIPLE INSTALLATIONS
• Individual KORAFLEX Pool FKP trench heater casings cannot be combined in this way and are available in P0 models only.
Recommended positioning of heat exchangers in trench heaters
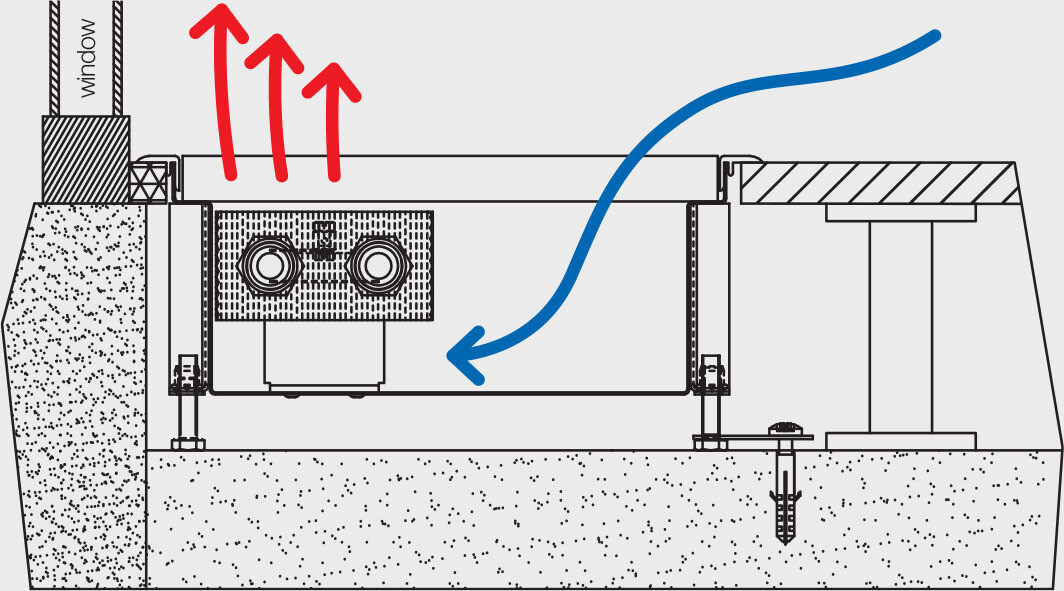
•Trench heaters should be positioned a maximum of 100mm from windows. In order to achieve maximum performance, the recommended position for heat exchangers in the trench heater is always on the window side. This results in natural air flow, whereby warm air rises and cool air is drawn into the trench heater. This way, cool air at the window is screened and ambient air is heated.
• Trench heaters are fitted as standard with right-hand connections to the heating system; a left-hand connection is achieved simply by rotating the heat exchanger 180°.
TRENCH HEATER INSTALLATION
Alterations to technical specifications reserved.
1 - trench heater with natural convection, 2 - heat exchanger, 3 - grille, 4 - U-frame, 5 - F-frame, 6 - set screws, 7 - anchors, 8 - up to 300mm deep dividing partition, 9 - window, 10 - floor level, 11 - grout,
12 - expansion joint, 13 - insulation, 14 - concrete filler, 15 - sub-floor
